Let's start with a simple analogy. Imagine a jar filled loosely with marbles. That’s your uncompacted soil—full of air pockets, unstable, and just waiting to shift. Now, give that jar a good shake. The marbles settle tightly together, the gaps disappear, and the whole thing becomes solid.
That’s soil compaction in a nutshell. It’s the methodical process of increasing soil density by pressing the particles closer, squeezing the air out to create a solid, stable base you can build on. Getting this right is the foundation of every successful project.
The Foundation Of Every Successful Project

Soil compaction is the unsung hero of any construction or civil works project. It’s the deliberate process of increasing the density of soil by removing air from the tiny spaces, or pores, between the individual grains. We aren't just flattening dirt; we're engineering a foundation that can evenly support immense weight without shifting, sinking, or failing down the line.
For any project in NSW, from a new driveway in Newcastle to a house slab on the Central Coast, getting this first step right is non-negotiable for long-term structural integrity. We’ve seen firsthand how crucial it is to get it right the first time.
When soil is left loose, it contains a significant volume of air. Under the weight of a concrete slab, a retaining wall, or constant vehicle traffic, this air will eventually be squeezed out. The result? The ground sinks or settles unevenly. This settlement can lead to disastrous and expensive consequences like cracked foundations, uneven floors, and failed pavements.
Proper compaction turns unstable ground into a reliable, load-bearing surface, providing the strength and stability required to support structures for decades to come.
Compacted Vs Uncompacted Soil At A Glance
To help you visualise the difference, this table gives a quick comparison of the key characteristics of uncompacted and compacted soil. Understanding these differences highlights why engineered fill is so critical for any serious construction project.
| Characteristic | Uncompacted Soil (Loose Fill) | Compacted Soil (Engineered Fill) |
|---|---|---|
| Density & Strength | Low density with poor load-bearing capacity. Prone to significant settlement under weight. | High density with excellent load-bearing strength. Designed to support structures with minimal settlement. |
| Air Voids | High volume of air pockets between soil particles, making it unstable and spongy. | Minimal air voids. Soil particles are tightly packed, creating a solid and stable mass. |
| Water Permeability | Water can move through it easily, potentially leading to erosion and washout beneath structures. | Lower permeability. It resists water penetration, preventing weakening of the foundation base. |
| Stability | Highly unstable and susceptible to shifting, swelling, or shrinking with moisture changes. | Very stable. It provides a consistent and predictable base that resists movement and environmental changes. |
Ultimately, soil compaction is a crucial quality assurance step. It’s about transforming unpredictable natural earth into a predictable, engineered material that meets the stringent requirements of Australian Standards like AS 3798 for earthworks.
For homeowners and builders across the Central Coast and Hunter Valley, ensuring your contractor understands and properly executes soil compaction is one of the most important decisions you'll make for the success and longevity of your project.
The Science Behind A Stable Foundation
When we talk about soil compaction, we're not talking about guesswork. It's a precise science. For any soil out there, from the clays of the Hunter Valley to the sandy loams on the Central Coast, there's a perfect recipe for achieving maximum strength. The two key ingredients are Optimal Moisture Content (OMC) and Maximum Dry Density (MDD). These aren't just technical terms; they are the exact targets we aim for on every single job.
Think of water as a lubricant for soil particles. The perfect amount of moisture—the OMC—lets all the individual grains slide past each other and nestle in as tightly as possible when we apply pressure. This is what gives us the highest possible density for that soil, its MDD. It's a surprisingly delicate balance.
Finding The Perfect Balance
Too little water, and the soil is just too dry. The particles create a huge amount of friction and simply resist moving, which stops them from packing down properly. You can roll it all day long, but you'll never hit the density you need.
On the other hand, too much water is just as destructive. All that excess water fills the tiny gaps between the soil particles that we're trying to close up. It literally holds them apart, turning the ground spongy and weak. Hitting the right compaction is impossible until that moisture level comes back down.
Getting the moisture content right is the single most critical factor in achieving specified compaction. It’s the difference between an engineered base that lasts a lifetime and a foundation that’s destined to fail.
The Role Of The Proctor Test
So, how do we find these magic numbers for your specific site? We don't guess. We rely on the gold standard: the Proctor Compaction Test, laid out in Australian Standard AS 1289.5.1.1. A sample of the soil from your Central Coast or Newcastle site gets bagged up and sent to a geotechnical laboratory.
In the lab, technicians test the soil at various moisture levels, plotting the results to create a "compaction curve." This graph scientifically pinpoints the exact OMC required to achieve the MDD. The lab report gives us a clear, non-negotiable target, ensuring the base for your new driveway or house slab in Sydney is engineered for maximum strength, not just flattened by eye. You can learn more about how this fits into the bigger picture in our detailed guide on excavation and foundation work.
This moisture challenge isn't unique to construction. In the heavy clay soils around Narrabri, NSW, farmers find that working the land when it's too wet dramatically worsens soil compaction, with damage reaching depths of up to 50cm. It’s a powerful real-world example of how excess moisture makes clay soils—common across the Hunter Valley—incredibly vulnerable to compaction, a major risk we have to manage carefully. This scientific approach strips away all the guesswork and is a fundamental part of getting the job done right the first time.
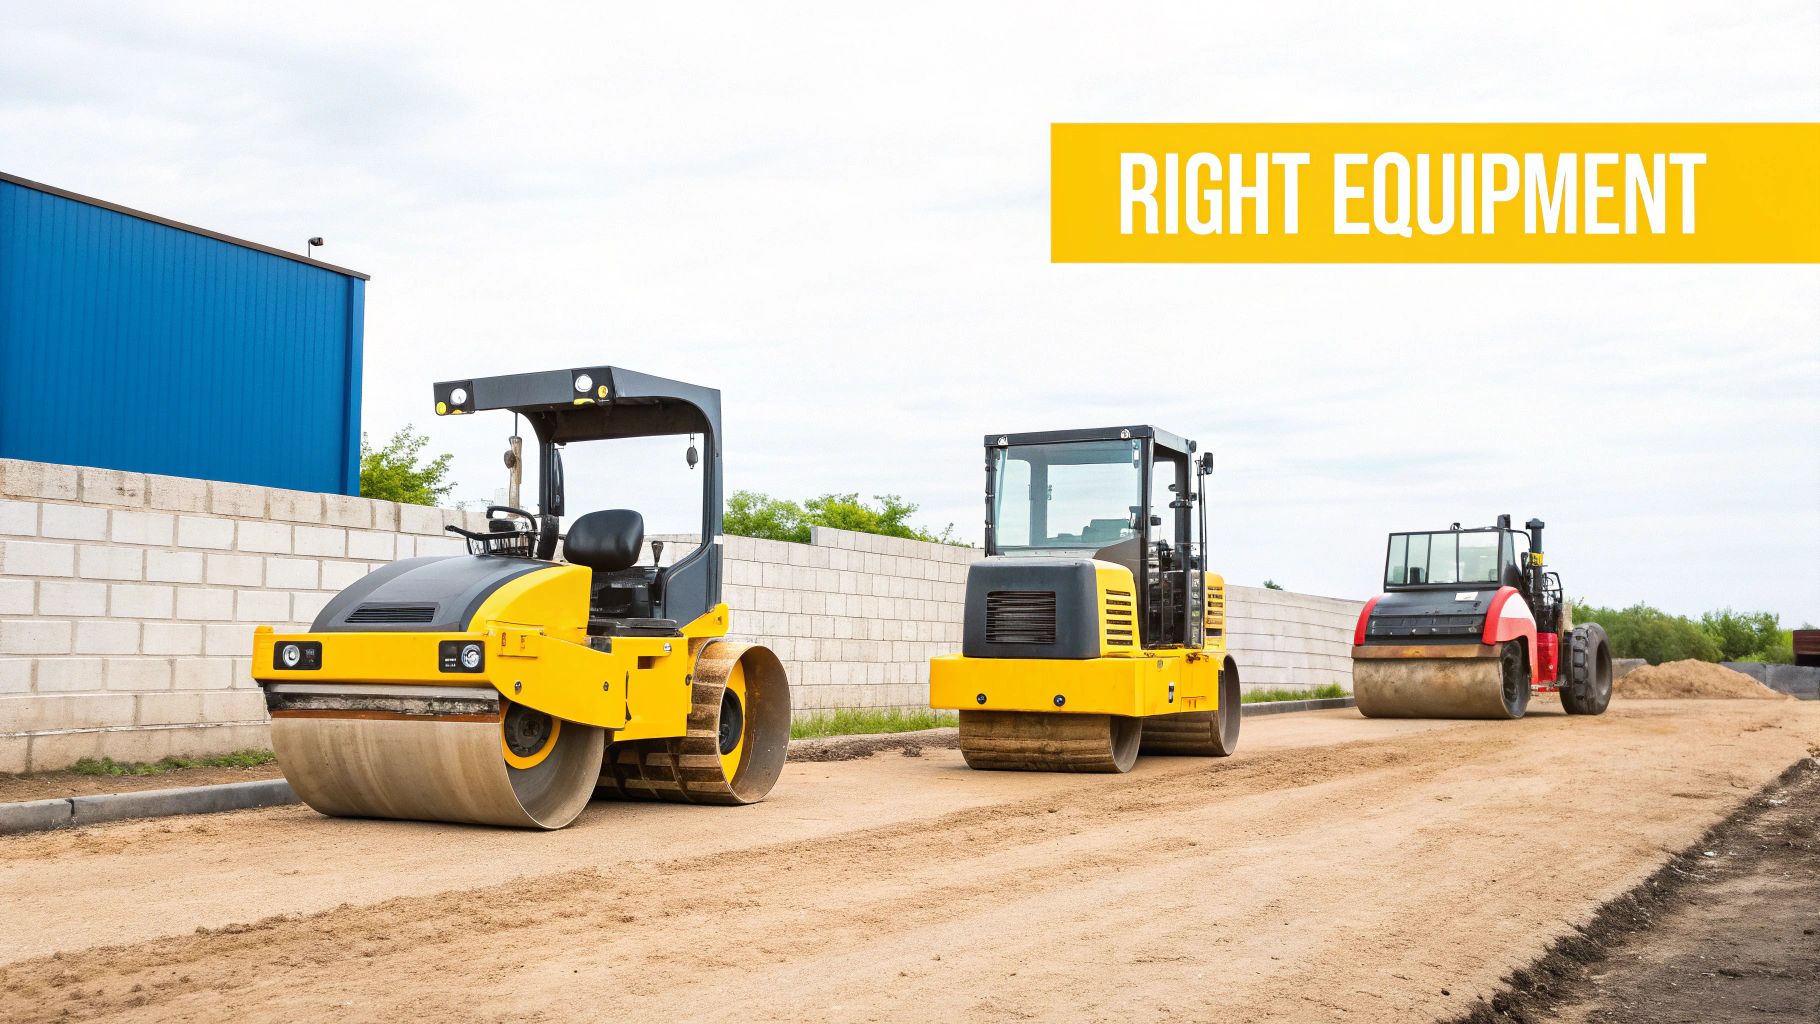
Choosing The Right Compaction Equipment For The Job
Using the right tool is critical for effective soil compaction. You wouldn't use a hammer to drive a screw, and it’s no different on a construction site. Picking the wrong roller or compactor for your specific soil and site conditions will lead to poor results, wasted time, and probably having to do the job all over again.
The machinery we choose isn’t just about getting the biggest machine possible; it’s about understanding the science of how different forces work on different types of soil.
This is where our 15+ years of hands-on experience on the Central Coast really makes a difference. Every single project, whether it’s a small residential driveway or a massive commercial site, starts with a proper understanding of what’s happening under our feet.
Rollers For Different Soil Types
For the granular, sandy soils common along coastal suburbs like Terrigal or Umina Beach, a smooth drum roller is the weapon of choice. This machine uses a powerful combination of its own immense static weight and a high-frequency vibration. This shaking action encourages all the individual sand and gravel particles to settle into a dense, tightly interlocked state. Think of it like shaking a jar of marbles—vibration reduces the friction between the particles, allowing them to pack together far more effectively than just weight ever could.
But if you head inland towards the Hunter Valley or parts of Western Sydney, you’ll hit cohesive clay soils. Clay is a completely different beast; it’s sticky and plastic-like, and vibration is next to useless on it. For this, we bring in a padfoot roller, which some people call a sheepsfoot roller. This machine has large, chunky protrusions or ‘feet’ on its drum. These feet deliver a high-pressure kneading action, manipulating the clay from the bottom of the layer upwards to squeeze out air pockets and force the particles together.
Trying to use a smooth drum on a thick layer of clay would be a classic mistake. It would just seal the surface, trapping weak, uncompacted soil right underneath.
Getting the equipment right is non-negotiable. Using the wrong type of roller for the soil doesn't just result in poor compaction; it creates a false sense of security, leaving behind a foundation that is destined to fail under load.
Compactors For Tight Spaces And Trenches
Big rollers are brilliant for wide-open areas like building pads or new carparks, but they’re completely impractical for smaller, more confined jobs. For those tight residential sites in Newcastle or when we're backfilling a trench after laying pipes in Gosford, we rely on smaller, more agile equipment.
A vibrating plate compactor, often just called a ‘wacker packer’, is a walk-behind machine with a heavy plate that vibrates at high speed. It’s perfect for compacting granular fill in trenches, around footings, or when preparing the sub-base for a new concrete path or driveway.
For deeper, narrower trenches or for compacting clay in tight corners, a trench rammer (or ‘jumping jack’) is the tool for the job. This machine delivers a series of high-impact blows, focusing a massive amount of force into its small 'foot'. This percussive energy is incredibly effective at compacting cohesive soils in layers, ensuring no weak spots are left behind.
Understanding what is soil compaction means knowing which of these specialised tools will deliver the best outcome.
How We Test and Verify Compaction On Your Site
So, after all the careful prep work and the precise passes with rollers and compactors, how do we actually know the ground is properly compacted? We don’t guess—we test. This quality control step is absolutely essential, not just for our own peace of mind, but to prove we’ve met the engineer’s specifications and the relevant Australian Standards.
Think of it as the final handshake between the science of the Proctor test and the practical work we’ve just done on the ground. Let's say we're on a job in Kariong. This test is the proof in the pudding, confirming the foundation for your new home or the sub-base for a commercial carpark in Newcastle has been built to last.
The Nuclear Densometer Test Explained
Our go-to tool for checking our work on-site is the Nuclear Densometer Test (NDT). It sounds complex, but this highly specialised piece of equipment gives us something incredibly valuable: near-instant, precise readings of both the soil’s density and its moisture content, right there on the spot. No sending samples off and waiting days for lab results; we get the data we need in minutes.
The NDT works by sending a small, safe radioactive source into the soil we’ve just compacted. By measuring how those particles scatter back to the device's sensors, it can accurately calculate the density of the material it’s sitting on. This lets us check our work in multiple locations across a site, ensuring consistent quality from one corner to the other.
Hitting The Target Relative Compaction
The readings from the NDT are what allow us to confirm we’ve hit the required 'relative compaction'. This is a simple but critical percentage that compares our on-site result to the Maximum Dry Density (MDD) that was figured out back in the lab from the Proctor test.
For example, a structural engineer might specify a minimum of 98% relative compaction for the fill under a house slab. That means the soil on-site must be compacted to at least 98% of its absolute maximum possible density.
Achieving the specified relative compaction isn't just a goal—it's a non-negotiable requirement. It is the final, measurable proof that the ground is strong enough to support whatever is built on top of it without risking settlement or failure down the track.
If the first test comes back at 96%, we know straight away we need to make another pass with the roller. The NDT allows us to make these adjustments in real-time, fine-tuning the compaction until we hit the engineer's target and can confidently sign off on the work. This process provides a documented record of quality control, which is essential for council inspections and building certification.
This level of attention to detail applies to all aspects of ground preparation. For instance, achieving the correct density is just as critical when preparing the ground for foundations, a process you can read more about in our guide to footings excavation. It’s this commitment to testing and verification that guarantees the structural integrity of your project from the ground up, ensuring we get it right the first time, every time.
The Costly Consequences Of Poor Compaction
Cutting corners on soil compaction is one of the most expensive mistakes you can make in any construction project. It’s a classic case of a small saving upfront leading to massive, heartbreaking repair bills down the track. When soil is poorly compacted, it’s not a matter of if it will settle, but when and how unevenly.
This uneven sinking is what engineers call 'differential settlement', and it’s the number one enemy of any structure. It places immense, unpredictable stress on everything built on top of the faulty ground, leading to failures that are both costly and dangerous.
From Cracked Driveways To Structural Failure
Imagine you’ve just invested in a beautiful new concrete driveway for your home on the Central Coast. If the road base underneath wasn’t properly compacted, it won’t take long for problems to appear. After a few heavy downpours, you’ll start to see water pooling, then deep ruts forming where your car tyres run. Soon after, spiderweb cracks will appear as the slab flexes over the unstable ground, eventually breaking apart completely.
Now, consider a far more serious scenario. Let's say a house foundation is laid on fill that was rushed and inadequately compacted. One corner of the slab begins to sink just a few millimetres more than the others. This tiny movement is enough to cause plaster walls to crack, doors and windows to jam in their frames, and tiles to lift and crack. In the worst cases, it can lead to catastrophic structural damage that compromises the safety of the entire home.
Poor compaction doesn't just create cosmetic issues; it directly undermines the structural integrity of your entire investment. The ground is meant to be a solid, predictable platform, and when it fails, everything above it is put at risk.
Drainage Nightmares And Environmental Impact
The problems don't stop at structural failures. Poorly compacted soil also wreaks havoc on site drainage. Instead of shedding water as designed, the ground becomes a patchwork of low spots and spongy areas. This can turn your yard into a swamp every time it rains, drowning landscaping and creating a breeding ground for pests. Even worse, it can lead to water pooling against your building's foundations, increasing the risk of water damage and rising damp.
This issue is amplified by our local climate. The NSW State of the Environment Report has shown that recent years have brought significant increases in rainfall, which has spiked hillslope erosion and puts even more pressure on poorly prepared ground. The report highlights that soils impacted by development recover very slowly, underlining why prevention through proper civil works is so critical. You can explore more insights into NSW's soil condition and environmental trends on the EPA website.
Ultimately, these expensive repairs highlight the true value of getting the groundwork right from the start. Understanding the real cost of excavation per cubic metre involves factoring in this essential quality control to prevent these disastrous outcomes.
Getting Compaction Right On Your Project
So, what does 'good' soil compaction actually look like on a real job site? It really depends on what you're building. The requirements can change a lot from one job to the next.
For something critical, like a concrete slab for a new home in Gosford, you're almost always aiming for 98% relative compaction. This is non-negotiable to meet engineering standards and guarantee you won't see any settlement down the track. But for a driveway sub-base or a structural landscaping area, 95% might be all you need.
Hitting these numbers isn't just about rolling over the ground with the heaviest machine you can find. It’s all about technique, patience, and a methodical approach. The secret is to build up the ground in thin, uniform layers, which we call 'lifts'.
Why We Always Work In Lifts
In our world, we almost always work in lifts between 150mm and 200mm thick. Trying to compact a deep, half-metre layer of fill all in one go is a classic mistake and a recipe for absolute disaster. That shortcut only ever manages to densify the top few inches, creating a hard crust over a weak, unstable pocket of soil underneath. It’s a common shortcut, and it’s responsible for a lot of failures.
Instead, by placing and compacting each lift individually, we build up a solid, uniformly dense mass from the very bottom right up to the final surface. This step-by-step process is the only way to guarantee the entire depth of the fill is stable and can handle the load it was designed for, leaving no hidden weak spots. You can see how this careful layering is a core part of our process for major bulk earth works projects.
Adapting Our Methods To Local Ground Conditions
This layered technique also has to be tweaked for the local soil conditions we see across the Central Coast, Sydney, and the Hunter Valley. The sandy soils you find near the coast in suburbs like Woy Woy need controlled vibration and careful moisture management to really lock the particles together.
But head inland towards the reactive clays of the Hunter, and the whole strategy shifts. Here, we might switch to different gear, like a padfoot roller, and we pay extremely close attention to the moisture content to stop that clay from swelling or shrinking later on. This infographic shows the typical domino effect of problems that start with a poorly compacted base.

As you can see, a single weak point in the foundation can set off a chain reaction of expensive structural damage. For a big job like a backyard pool landscaping project, getting the compaction right from the start is what ensures everything stays put and you’re not dealing with costly problems years down the road.
Got Questions About Soil Compaction? We've Got Answers.
We get a lot of calls from people across the Central Coast trying to get their heads around soil compaction. It's one of those crucial jobs that’s easy to overlook but impossible to fix later. Here are some of the most common questions we answer, laid out in simple terms.
Can You Over-Compact Soil?
Yes, you absolutely can, and it causes huge problems. While the goal is to get the soil dense and stable, going too far is just as bad as not doing enough.
When you over-compact soil, especially clay-heavy types, you can literally crush its internal structure. This makes it almost completely waterproof. Water just pools on top instead of soaking in, leading to serious drainage issues and waterlogging. For plants, it’s a death sentence—the ground becomes so hard their roots can't get through. Our aim is always to hit the specific density target from the engineer's report, not just hammer the ground into submission.
How Long Does Soil Compaction Last?
When it’s done right for a structural base, proper compaction is permanent. That’s the whole point.
Engineered fill is designed to create a solid, stable platform that won't sink or move for the entire life of the structure it's supporting, whether that's a house slab, a commercial carpark, or a retaining wall. This is exactly why getting it right the first time is non-negotiable—there are no second chances once the concrete is poured. In a garden bed or a paddock, however, compaction from foot traffic or machinery is a recurring headache that needs constant management.
Can I Just Hire a Wacker Packer and Do It Myself?
For small, non-structural jobs like a garden path or a little patio base, hiring a plate compactor from the local hire shop is a pretty common DIY move.
But for anything that has to bear a real load—driveways, shed slabs, house foundations, or retaining walls—you absolutely need professional expertise. Proper soil compaction from an engineering standpoint involves a deep understanding of soil types, precise moisture control, and the right testing methods to meet Australian Standards. The risk of getting it wrong and causing a costly structural failure completely dwarfs any money you might save trying to do it yourself.
Ready to make sure your project starts on solid ground? The team at Booms Up Civil has over 15 years of experience delivering correctly engineered and verified soil compaction for projects across the Central Coast, Sydney, and Newcastle. Contact us today for a free assessment and quote.