A solid sandstone retaining wall is much more than just a pile of rocks. It’s a precise blend of smart engineering, a thorough site assessment, and knowing your way around local council rules. It all starts with really getting to know your block of land—from the soil under your feet to the angle of the slope—to build something that’s not just stunning but will stand the test of time.
Starting Your Sandstone Retaining Wall Project
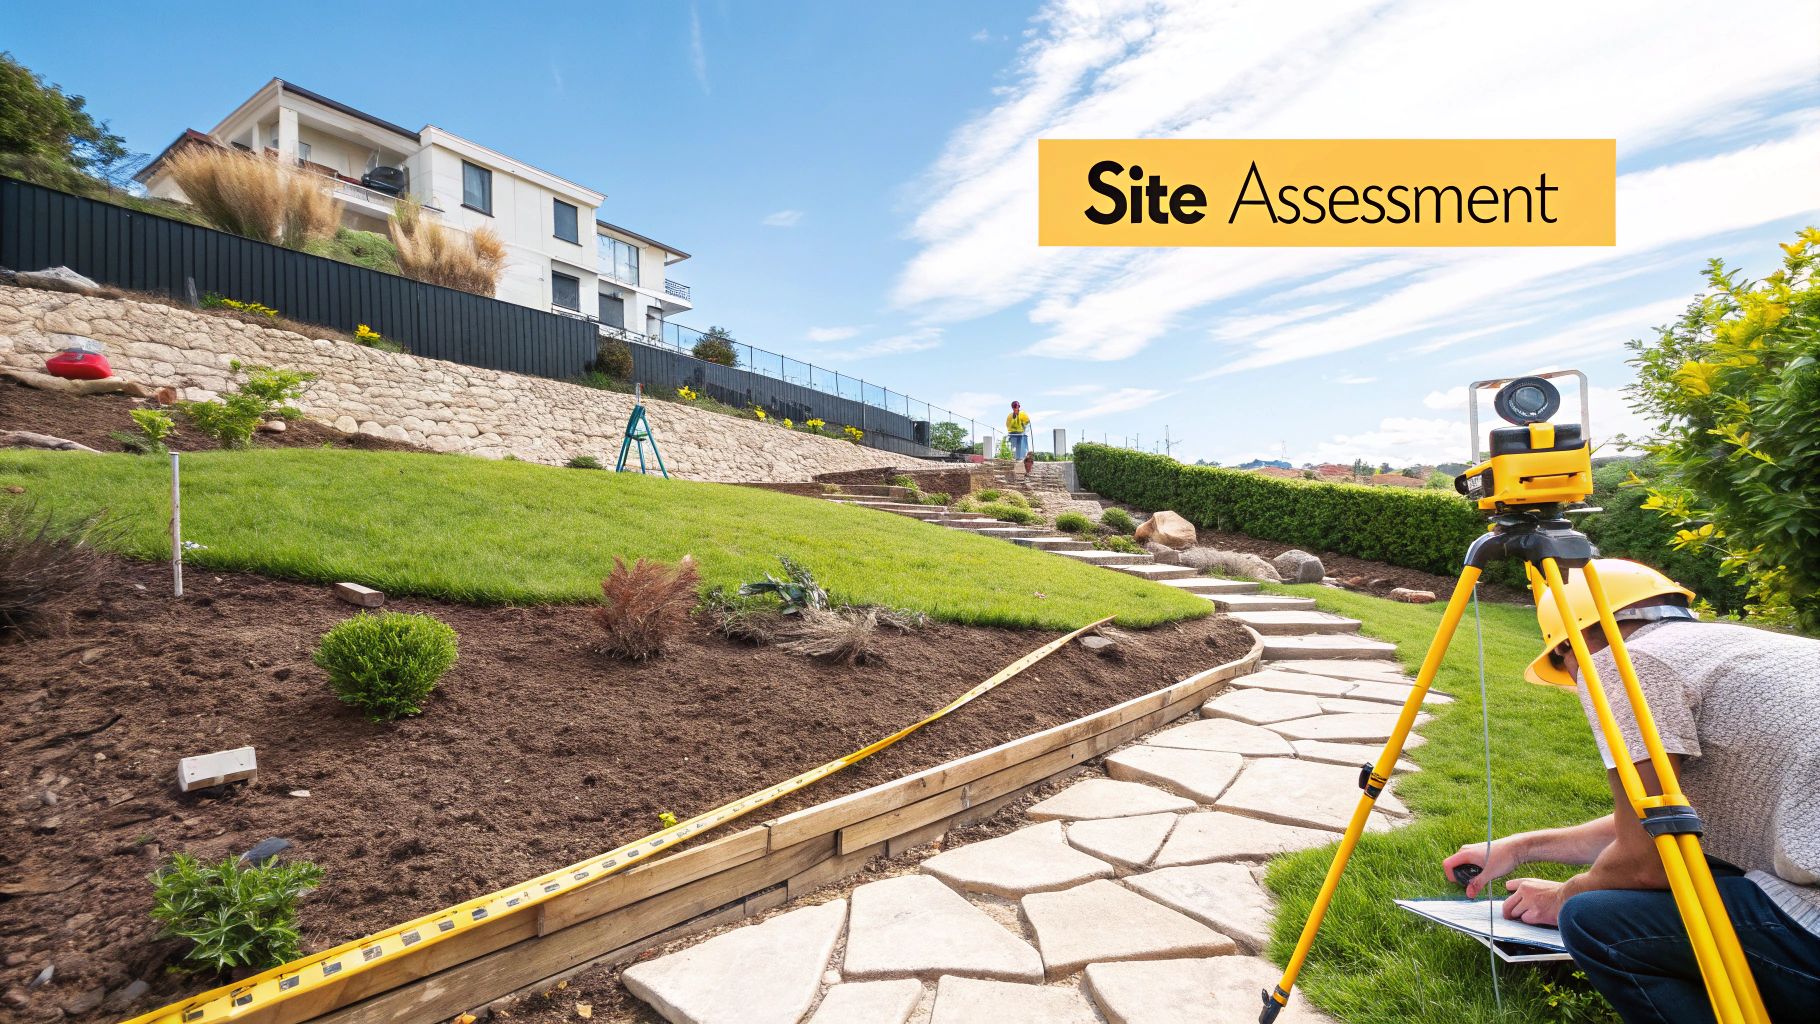
Kicking off a sandstone retaining wall project is a great way to transform your property. But before a single stone gets laid, you absolutely need a solid plan, and that plan must be built on a proper site assessment. This groundwork is what sets you up for a safe, compliant, and durable structure, saving you from headaches and costly fixes later on.
The very first thing we do is analyse the land. Let’s say you’re building on a steep Terrigal block with sandy, free-draining soil. That’s a completely different beast to a property out in Maitland with its heavy, reactive clay. Understanding these local quirks from day one guides every single decision we make, from the footing design right through to the drainage solution.
Understanding Your Site’s Unique Challenges
Every patch of dirt has its own personality. We kick things off by digging into a few key factors that will have a direct impact on the design of your sandstone retaining wall:
- Slope and Gradient: We’ll measure the steepness of the land. This tells us the height and structural forces the wall needs to handle. A steeper slope means a lot more soil pressure pushing against it.
- Soil Composition: Is your soil sandy like you find all over the Central Coast, or is it that dense clay common in the Hunter Valley? This dictates everything—the type of excavation needed, the footings we design, and the backfill we use.
- Water Flow: Where does the rain go when it hits your property? Figuring out the natural water paths is critical. It’s how we plan an effective drainage system to stop hydrostatic pressure from building up behind the wall and causing it to fail.
- Site Access: How are we going to get machinery and materials onto the site? Tight access, which we see all the time in the packed suburbs of Sydney, might mean we need to bring in specialised equipment to get the job done.
The All-Important Council Conversation
Before you get your heart set on a design, you’ve got to get your head around the local council regulations. The rules for retaining walls can change dramatically between areas like Central Coast Council, Newcastle City Council, and the different councils in the Greater Sydney region.
Generally speaking, any wall over a certain height—often just 600mm—or one that’s built close to a property boundary is going to need a Development Application (DA) and an engineer’s sign-off. The best first move is a quick call to your local council’s planning department. They’ll clarify what you need, helping you budget for any engineering or application fees and making sure your project is above board from the start.
In Australia, sandstone is a top choice for its sheer durability. A well-built wall can easily last over 50 years, which is exactly why councils take their construction so seriously. Getting it right the first time is crucial, as this is a key part of our structural landscaping services.
Navigating Council Rules And Australian Standards

Building a sandstone retaining wall isn’t just about stacking blocks. It’s about constructing a safe, compliant structure that satisfies both your local council and Australian engineering standards. Getting this part wrong is a recipe for disaster—think costly removal orders, disputes with neighbours, or even a complete structural failure down the line.
We’ve seen it happen, which is why we always prioritise safety and compliance to get the job done right the first time.
Many homeowners are surprised to learn their retaining wall project isn’t just simple landscaping. Here in NSW, the rules are quite clear. If your wall is over a certain height—usually 600mm—or is creeping close to a boundary, you will almost certainly need a formal Development Application (DA) and an engineer’s certification. This isn’t just red tape; it’s a critical safety net.
When You Need An Engineer And A DA
Let’s say you’re on a steep block in Gosford, planning a series of tiered garden walls to create some flat, usable space. The moment any of those walls pops over that 600mm height threshold, the Central Coast Council sees it as a structural element. That’s the trigger.
This is where a structural engineer becomes your most important partner. Their job is to calculate all the forces at play, specify the footing depth, design a bulletproof drainage system, and provide certified plans for the council submission. Trying to sidestep this is a massive risk that can void your property’s insurance and create serious legal headaches.
Understanding Australian Standard AS 4678
The bible for this kind of work is Australian Standard AS 4678 for Earth Retaining Structures. This document lays out the minimum requirements for design and construction, ensuring every wall is stable and safe. It covers everything from the types of materials you can use to how you must account for soil and water pressure.
For instance, the standard dictates how to calculate “surcharge loads.” A surcharge is any extra weight sitting on the soil behind the wall. This could be a driveway, a carpark, or even a large mound of earth. The engineer has to factor this extra pressure into the design to prevent the sandstone wall from bulging or, worse, collapsing.
A common mistake we see is people assuming a short wall doesn’t need proper engineering. The reality is that even a small wall supporting a driveway or pathway is under immense, constant pressure. Adhering to AS 4678 isn’t about ticking a box; it’s fundamental to building a structure that will stand for decades.
Setbacks And Boundary Lines
Another critical piece of the puzzle is your wall’s position relative to your property boundary. Councils have strict rules about how close you can build to a neighbour’s fence, known as setback requirements. These rules are in place to ensure your construction doesn’t impact their land, alter natural ground levels, or mess with drainage.
Planning a wall right on the boundary line often requires a formal agreement with your neighbour and can make the DA process more complex. Before you even think about clearing land, it’s vital to have an up-to-date survey and to know your council’s specific setback distances. For larger projects, understanding the full process of residential land clearing is a necessary first step, as it also has its own compliance hurdles.
Choosing The Right Sandstone And Build Method
Picking the right sandstone for your retaining wall is a delicate balance of looks, budget, and raw structural strength. It’s a common misconception that all sandstone is the same. Far from it. The choice you make here will define the entire character of your wall and how it stands up to the elements over time. Are you after a sleek, formal finish or something more rugged and natural that looks like it’s been there forever?
The stone itself directly influences how we build the wall. For a sharp, modern home on Sydney’s North Shore, we’d likely use precisely cut ‘A’ Grade blocks, meticulously laid with mortar for a clean, formal look. But for a sprawling property out in the Hunter Valley, rustic, random boulders create a feeling of permanence, as if they’ve been part of the landscape for centuries. These are typically installed using a dry-stacking method that enhances their natural appeal.
Matching Stone Grade To Your Vision
When we talk about sandstone “grades,” we’re really just describing the quality of the cut and how consistent the blocks are. Each grade lends itself to a different style and comes with its own price tag and labour requirements.
- ‘A’ Grade (or Diamond Sawn): These are the top-tier blocks, sawn perfectly on all six sides to create uniform rectangles. They’re the go-to for formal feature walls, integrated garden seating, and high-end residential projects where clean lines are a must. Their consistency makes them relatively straightforward to lay with mortar, but they are the most premium option.
- ‘B’ Grade: This is probably the most popular and versatile choice we see. ‘B’ Grade blocks are usually sawn flat on the top and bottom but have rough, “rock-faced” front and back sides. This gives the wall a fantastic textured appearance while still allowing us to build stable, level courses. It strikes an excellent balance between a natural aesthetic and a sensible budget.
- Random Boulders (or Bush Rock): If you want a wall that feels completely organic, you can’t beat random boulders. These stones are all different shapes and sizes, and it takes a seriously skilled machine operator to piece them together like a giant, heavy puzzle. The result is incredible—a wall that blends seamlessly into its surroundings.
The infographic below really helps visualise how these choices connect.
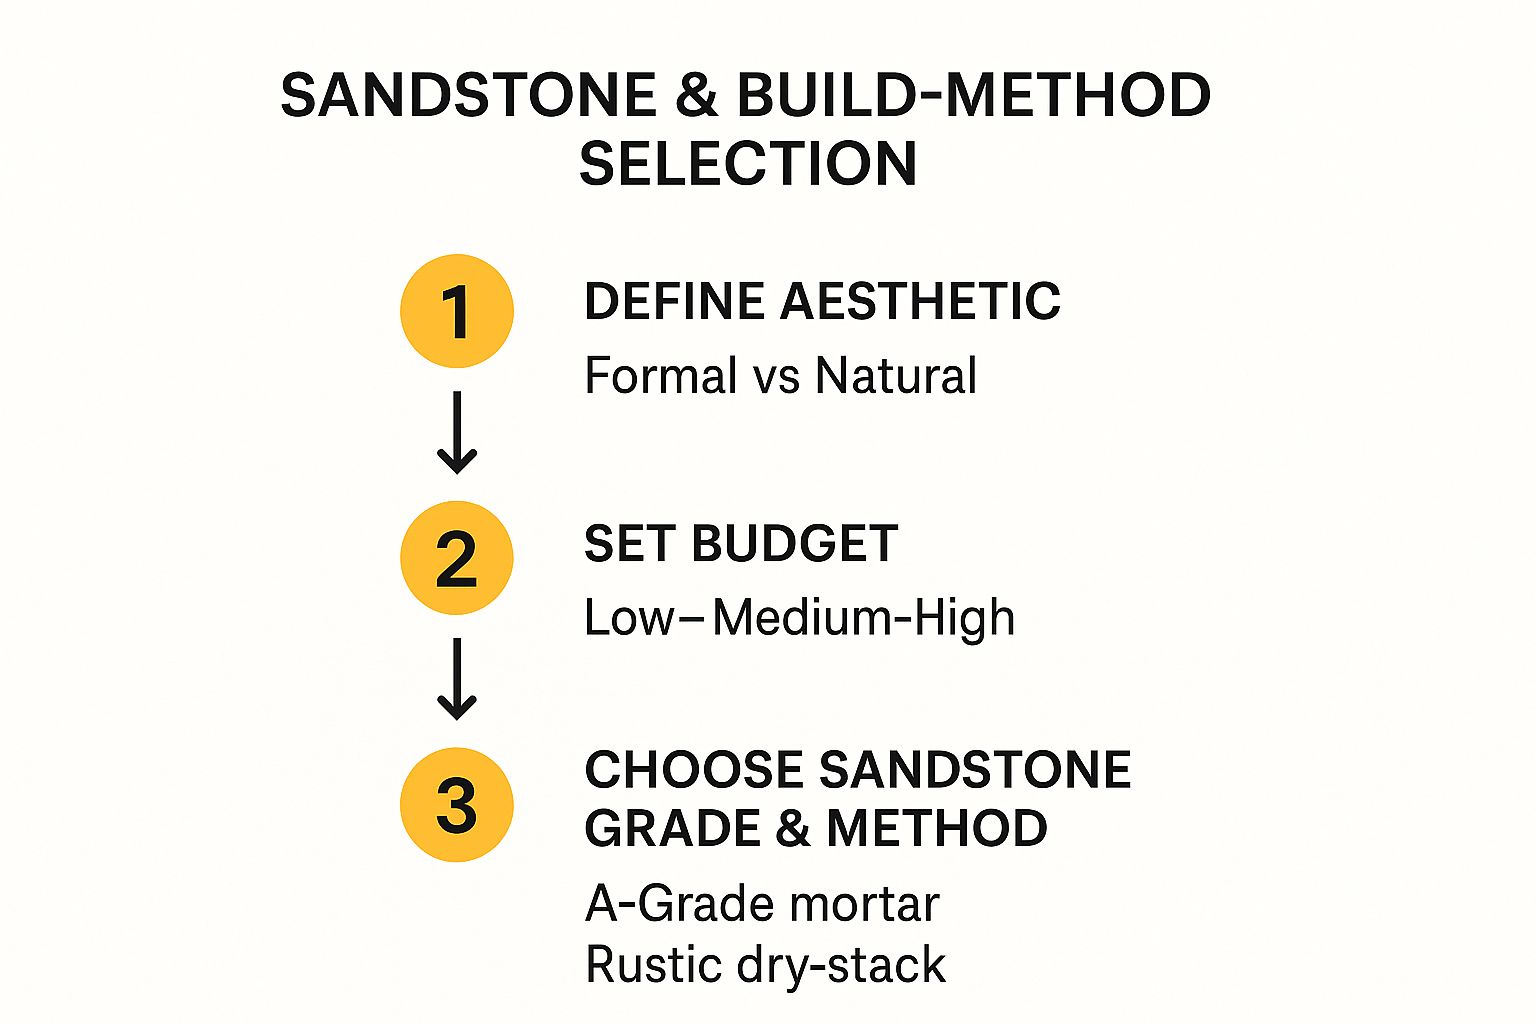
As you can see, the look you’re after and your budget are the two biggest factors steering you towards a particular grade of stone and the construction method that goes with it.
To make it even clearer, here’s a quick breakdown of how these common sandstone types stack up against each other.
Sandstone Block Type Comparison
| Sandstone Type | Appearance And Finish | Best Suited For | Relative Cost And Labour |
|---|---|---|---|
| ‘A’ Grade (Diamond Sawn) | Uniform, clean lines, formal and precise. Minimal joint variation. | Feature walls, high-end residential, stairs, formal garden edging. | High: Premium material cost. Labour is skilled but efficient due to uniformity. |
| ‘B’ Grade (Sawn Top/Bottom) | Textured rock face with level courses. Natural but structured look. | General retaining walls, garden beds, subdivision walls. A versatile all-rounder. | Medium: A good balance of material cost and installation efficiency. |
| Random Boulders (Bush Rock) | Rustic, organic, and irregular. Each wall is completely unique. | Natural landscapes, rural properties, feature walls aiming for a rugged look. | Variable: Material can be cost-effective, but labour is highly skilled and time-consuming. |
Ultimately, this table shows there’s no single “best” option—it’s all about finding the perfect fit for your specific project’s goals and site conditions.
Dry-Stacking Versus Mortared Walls
The construction method is every bit as critical as the stone itself. The two main paths we take are dry-stacking the blocks or binding them with mortar, and each has distinct advantages.
A dry-stacked wall is pure physics. It relies on the sheer weight of the blocks and the immense friction between them to create a solid structure. This technique is perfect for B-Grade blocks and random boulders, as it allows for tiny, imperceptible movements and provides excellent natural drainage through the gaps. The aesthetic is more rustic and ages beautifully.
On the other hand, a mortared wall uses a cement mortar to lock the blocks into a single, rigid structure. This is the only way to go for ‘A’ Grade blocks if you want that perfectly smooth, formal finish. While it delivers incredible strength, it absolutely must be built on precise concrete footings and needs weep holes designed into it to let water escape. Without proper drainage, hydrostatic pressure can build up and crack the mortar joints over time.
Sandstone is a fantastic, sustainable material, and the Australian construction industry has rightly embraced it. A typical random sandstone boulder wall can range from $350 to $500 per square metre, with the final cost depending heavily on things like site access and the specific rock we’re working with. Using local sandstone doesn’t just support our quarries; it also shrinks the environmental footprint of your project. Before you lock in a final decision, it’s also worth reading a good guide to various types of natural stone to see what other options might complement your design.
Why Drainage and Footings are so Important
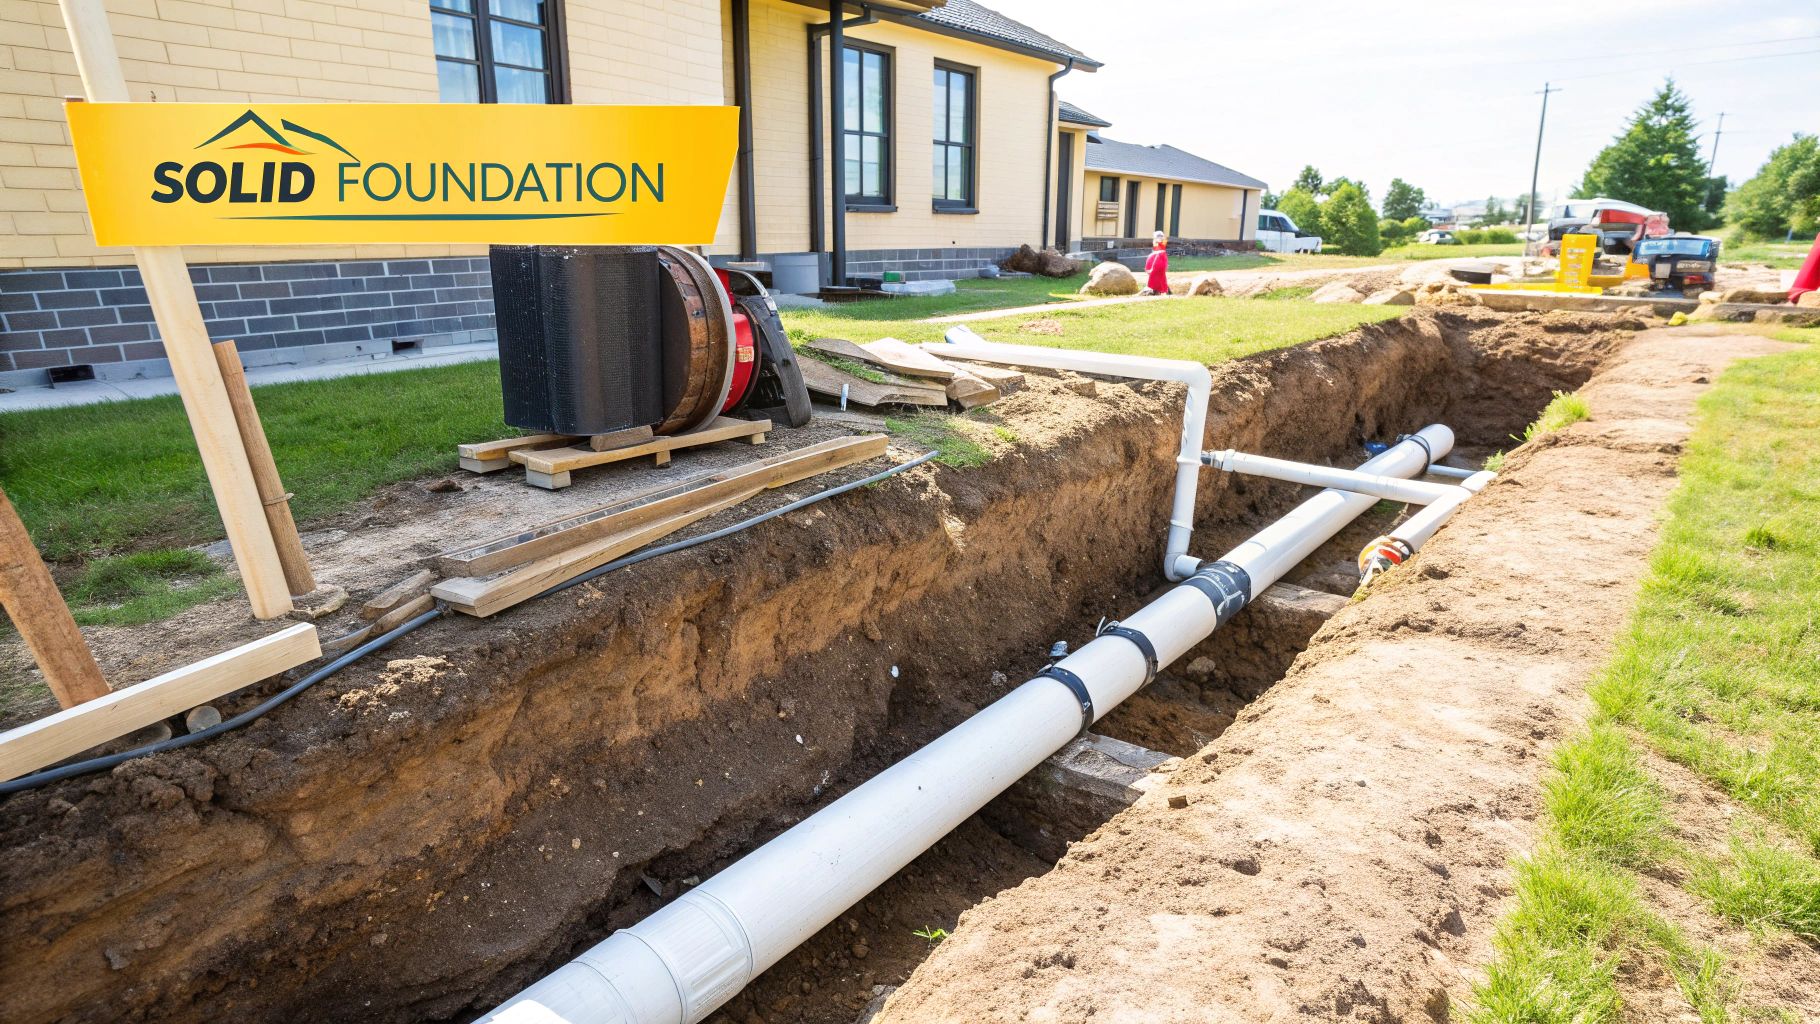
A stunning sandstone wall is only ever as strong as its hidden components. We can’t stress this enough: the overwhelming majority of retaining wall failures come down to two things—poor drainage and inadequate footings. Get these wrong, and even the best-looking wall is living on borrowed time.
The number one enemy of any retaining structure is something called hydrostatic pressure. Think of it as the immense, invisible force of waterlogged soil pushing relentlessly against the back of your wall. After heavy rainfall, which we see plenty of on the Central Coast and in Newcastle, the ground becomes saturated, heavy, and immensely powerful.
Without a way for that water to escape, the pressure will find a weak point, causing the wall to lean, bulge, or even collapse entirely.
Designing a Bulletproof Drainage System
An effective drainage system isn’t an optional extra; it’s the lifeblood of a durable sandstone retaining wall. Its one and only job is to give water an easy escape route before it can build up and cause chaos. A professionally designed system involves a few key, non-negotiable elements working together.
First, we line the back of the excavated area with a high-quality geotechnical fabric (geofabric). This tough material acts as a filter, allowing water to pass through but stopping soil and fine silt from clogging up the drainage aggregate. This is absolutely crucial for long-term performance.
Next, we place a perforated agricultural pipe (or Ag-pipe) at the base of the wall, ensuring it has a slight fall to direct water away to a suitable outlet. This pipe is then surrounded by a free-draining material like blue metal gravel or recycled aggregate. This aggregate zone creates a pathway for water to quickly travel down to the Ag-pipe and be carried away safely.
We often see DIY walls that have skipped the geofabric or used the wrong backfill. The result is always the same: within a few years, the drainage clogs, hydrostatic pressure builds, and the wall starts to fail. It’s a textbook case of a small saving upfront leading to a massive, expensive fix down the track.
Finally, for mortared walls, we install weep holes. These are small pipes or gaps placed in the bottom course of the wall, offering a final, visible exit point for any trapped water. They act as a pressure relief valve, ensuring the system never gets overwhelmed.
Getting the Footings Right for Your Soil
If drainage is the wall’s circulatory system, then the footings are its skeleton. The footing is the foundation that transfers the immense weight of the wall and the soil behind it safely into the ground. Its design depends entirely on the wall’s height, the weight it’s holding back, and, most importantly, the local soil conditions.
A sandstone wall being built on the free-draining sandy soils near Caves Beach in Lake Macquarie will require a very different footing design than one constructed on the heavy, reactive clay common around Maitland and the Hunter Valley. Sandy soils drain well but can shift, while clay swells when wet and shrinks when dry, placing huge stress on any structure built on it.
For taller, engineered walls, a reinforced concrete footing is almost always specified. This provides a rigid, stable base that spreads the load over a wide area, preventing sinking or movement. For smaller, dry-stacked walls, a deeply compacted road base footing can be sufficient, provided the underlying ground is stable. We offer expert concreting services for the Central Coast and know precisely what kind of foundation your project needs to stand firm.
When considering the long-term stability of your wall, it’s also helpful to understand how to apply expert erosion control, grading, and landslide prevention strategies, as these principles are at the core of what makes a retaining wall successful.
The Construction Process: From Excavation To Capping
With the design locked in and the sandstone blocks waiting on site, the real work begins. This is where meticulous planning finally takes shape as a physical structure. Getting this stage right is all about following a methodical process—it’s the secret to building a sandstone retaining wall that will stand strong for decades.
You have to remember that every step builds on the one before it. There are no shortcuts here; getting each phase right is simply non-negotiable.
The whole thing kicks off with precise site preparation. This isn’t just about clearing a space; it’s about laying the groundwork for a safe, accurate build. Before a single sod of turf is turned, our first call is always to Dial Before You Dig. Unearthing a water main or slicing through a communications cable is a dangerous and expensive mistake that’s entirely avoidable. Safety governs everything we do, and all our work strictly adheres to SafeWork NSW guidelines.
The Critical Excavation Phase
Once we’ve got the all-clear on underground services, the excavator gets to work. Precision is the name of the game here. We excavate the area for the wall’s footing and the crucial drainage zone behind it, digging to the exact depth and width spelled out in the engineering plans. The stability of your entire wall hinges on this initial cut being perfect.
Think about a project on a tight, sloped block in a dense Sydney suburb. Access can be a nightmare, often demanding specialised machinery to get the job done without upsetting the neighbours. For those tricky sites, knowing the ins and outs of difficult access excavation is what makes a project feasible in the first place.
Laying The Foundation And First Course
With the excavation done and dusted, we lay the footings. This could be a reinforced concrete slab or a deeply compacted road base, but either way, this foundation is what carries the immense weight of the wall. We obsess over getting it perfectly level because any tiny imperfection at this stage will be amplified with every new layer of blocks.
The first course of sandstone is, without a doubt, the most important. Each block is carefully placed, checked for level in both directions, and perfectly aligned. This single layer dictates the line, strength, and integrity of the entire wall. Taking the time to get this step 100% right is one of the most vital parts of the whole build.
A common shortcut is to rush the first course, thinking you can fix small errors later on. This is a huge mistake. A crooked or unstable base will always lead to a weak, ugly wall that’s nearly impossible to fix without tearing it down and starting over.
Building Upwards: Backfilling And Drainage
As we build the wall upwards, course by course, we’re also installing the drainage system and backfilling behind it. This isn’t done all at once; it happens in stages, or “lifts,” to make sure everything is properly compacted and secure. We lay our geofabric against the excavated earth, place the aggregate and Ag-pipe, and then backfill with the specified material.
Each layer of backfill is compacted thoroughly. This is critical to prevent the soil from settling over time, which would weaken the wall’s support and put a huge amount of stress on the sandstone blocks. The drainage system is built up in sync with the wall, ensuring it works effectively from the very bottom to the top.
The Finishing Touches: Capping And Landscaping
The final structural element is capping the wall. Capping stones provide that clean, finished look, but they also serve a practical purpose: protecting the wall’s structure from water seeping in from above. They really tie the whole project together, turning a functional structure into a polished landscape feature.
Once the wall itself is complete, the final job is to blend it into the surrounding environment. This might involve grading the soil to meet the top of the wall, laying down fresh turf, or preparing new garden beds. If the design includes a fence on top of the wall, we ensure the footings and posts are installed correctly, finally completing your project and transforming your outdoor space.
Common Retaining Wall Problems And How To Avoid Them
Building a sandstone retaining wall right the first time is always more affordable than fixing a major failure down the track. Over our 15+ years on the Central Coast, we’ve seen our fair share of walls built by others that just didn’t last. The tell-tale signs are usually obvious: leaning, cracking, or a distinct bulge in the middle.
These problems almost never stem from the sandstone itself. The real culprits are hidden from view—poor drainage, weak footings, or a design that was simply under-engineered for the load it had to bear. Getting these fundamentals wrong is like building a ticking time bomb in your backyard.
A Common Central Coast Scenario
Imagine this: a beautiful sandstone wall was built to terrace a backyard on a sloping block in a high-rainfall area like Kariong. For the first year, it looks fantastic. But after a particularly wet summer, the owner notices the bottom blocks are pushing out and dark, damp patches are appearing on the stone face.
This is a classic case of hydrostatic pressure at work. The builder likely failed to install a proper drainage system behind the wall—no geofabric to stop soil clogging the system, not enough aggregate backfill, or an Ag-pipe that’s blocked or non-existent. All that rainwater had nowhere to go, turning the soil into a heavy, liquid force that pushed the wall to its breaking point.
The fix for a problem like this is never cheap or easy. It often involves excavating the entire area behind the wall, rebuilding the drainage system correctly, and then restacking the wall. This is why spotting red flags in a quote or design before work starts is so important.
Red Flags To Watch For
A quality contractor will always prioritise what you can’t see. When you’re reviewing a quote or discussing a sandstone retaining wall design, be wary of anyone who skims over the details of drainage and footings. If their plan doesn’t specifically mention geofabric, aggregate, and engineering for walls over 600mm, it’s a major red flag.
The strongest walls are built on a foundation of solid engineering and a deep understanding of how water and soil behave. By focusing on these critical, behind-the-scenes elements, you can choose a contractor who values quality over shortcuts and ensures your investment stands strong for decades to come.
Got Questions About Sandstone Walls? We’ve Got Answers.
We get asked a lot about the ins and outs of building sandstone retaining walls, whether it’s on the Central Coast, up in the Hunter, or down in Sydney. Here are some of the most common queries we tackle.
How Long Does a Sandstone Retaining Wall Last?
A professionally built sandstone retaining wall is a serious long-term investment for your property. When you get the footings right, nail the drainage, and use quality stone, you should expect it to stand strong for 50 years or even longer.
The sandstone itself is incredibly durable. In our experience, when a wall fails, it’s almost never the stone’s fault—it’s usually a mistake in the design or construction that lets it down.
Do I Need Council Approval for My Retaining Wall?
This is a big one, and the short answer is: probably. Yes, you almost certainly need council approval if the wall is over 600mm high or if it’s being built close to a property boundary.
Every council has its own specific rules, whether you’re dealing with Central Coast Council or Newcastle City Council. Our advice is always the same: have a chat with your local council’s planning department before a single sod is turned. It can save you a world of expensive headaches down the track.
Can I Build a Sandstone Retaining Wall Myself?
Look, for a tiny, decorative garden edge under 600mm high, a DIY approach might be on the cards if you’re really confident.
However, for any wall that’s actually structural and has to hold back a significant amount of soil, we strongly advise against it. The risk of failure from poorly designed footings, bad drainage, or just improper block placement is simply too high. Building these walls properly requires specialised heavy equipment and a level of expertise you only get from years of doing it.
What Is the Most Important Part of a Sandstone Retaining Wall Design?
Without a doubt, it’s the stuff you can’t see once the job is done: the drainage system and the footings.
Hydrostatic pressure—the force of trapped water pushing against the wall—is the number one killer of retaining walls.
That’s why a robust drainage system is completely non-negotiable. This means installing geofabric, the right aggregate (gravel), and a slotted Ag-pipe to carry water away safely. At the same time, the footings need to be engineered specifically for your site’s soil conditions to guarantee the wall’s stability for decades to come.
Ready to start planning a sandstone wall that’s built to last? The team at Booms Up Civil has over 15 years of experience delivering structurally sound and visually stunning retaining walls across the Central Coast and beyond.
Contact us today for a consultation and a no-obligation quote.