Think of a vehicle access crossing as the official handshake between your property and the public road. It’s not just the sloped bit of your driveway; it's the engineered section on council land that lets you safely cross the nature strip, kerb, and footpath. Getting this small but crucial piece of infrastructure right is non-negotiable for safety and compliance. We’ve been building these across the Central Coast and Sydney for over 15 years, so we know how to get it right the first time.
What a Vehicle Access Crossing Is and Why It Matters
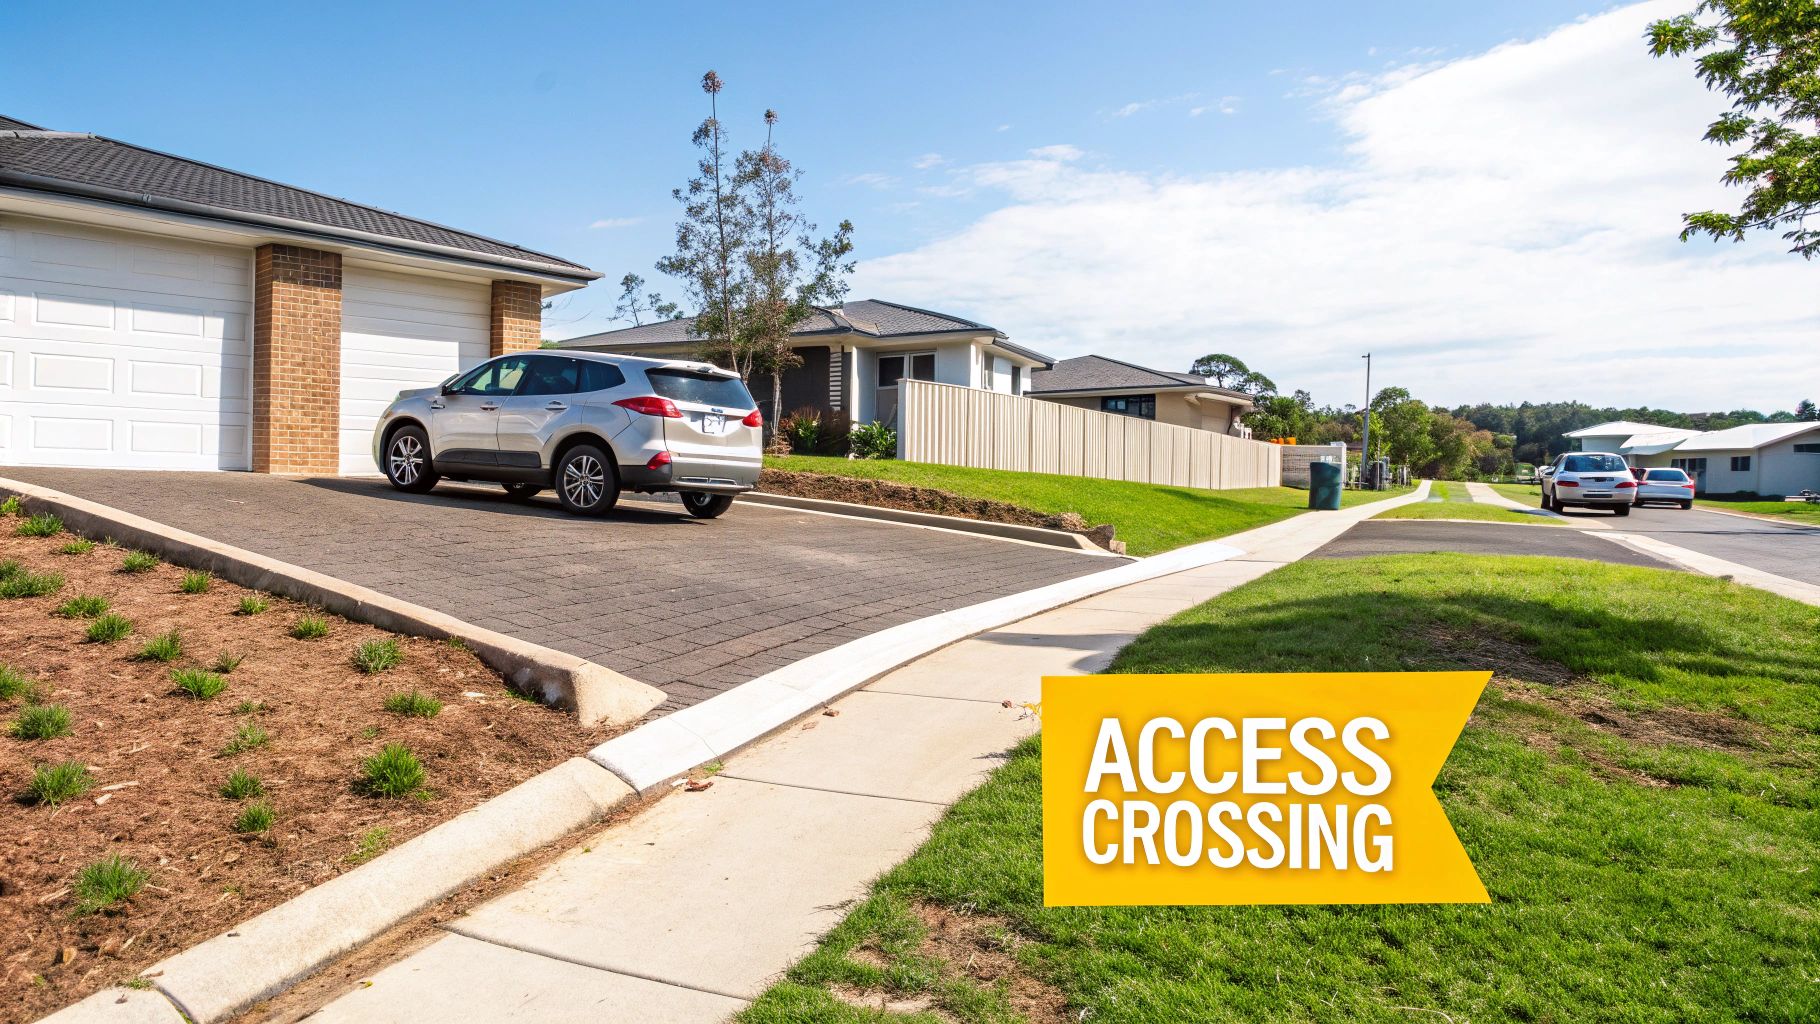
The easiest way to think about a vehicle access crossing is to picture it as a small, purpose-built bridge. This "bridge" doesn't span a creek but instead protects essential underground services like water mains, sewer lines, and NBN cables running right along the road reserve. It has to be specifically designed to handle the weight of cars and trucks without crushing those public assets.
At the same time, it has a critical job to do with stormwater. A properly constructed crossing directs rainwater into the street's kerb and gutter system, preventing it from pooling on the footpath or, worse, flooding your property. This is a huge reason why councils from the Central Coast to Sydney have such strict rules.
The Real-World Consequences of Getting It Wrong
Building a crossing that doesn’t meet council standards is a recipe for headaches. An incorrectly built crossover can kick off a whole host of issues that are both frustrating and expensive to fix. These problems don't just affect you—they can impact your neighbours and public safety.
Just consider these common scenarios we see all the time across the Hunter Valley and Sydney:
- Vehicle Damage: If the gradient is too steep or the transition from the road is too abrupt, cars will scrape their undercarriage. This is a classic issue on sloping blocks in suburbs like Terrigal or Kariong.
- Drainage Nightmares: A poorly shaped crossing can act like a dam. This causes water to pool on the footpath or, even worse, diverts runoff into your or your neighbour's property, leading to messy disputes and water damage.
- Failed Council Inspections: Councils always conduct final inspections. If the work doesn't comply with the approved plans, they can issue an order to demolish and rebuild it entirely at your expense. Suddenly, a straightforward job becomes a costly disaster.
Understanding the link between your private land and public infrastructure is key here. While the driveway on your property offers plenty of creative freedom, the crossing demands strict adherence to engineering standards. You can explore all sorts of options for your private driveway—we cover many of them in our guide to concrete driveways on the Central Coast. But the crossing itself is all about safety, compliance, and function, setting the foundation for seamless access for years to come.
Navigating Council Regulations and Australian Standards
Before a single shovel hits the dirt, it's critical to understand the rulebook. Building a vehicle access crossing isn't a freestyle job; it's a highly regulated process designed to guarantee safety, protect public assets, and ensure the work actually lasts. Getting this part wrong is a recipe for a rejected project and a costly order to demolish everything and start from scratch.
The whole process is governed by a framework of national standards and local council rules. Think of it as two layers of protection. The first layer is the national benchmark, setting the minimum safety and engineering requirements for everyone in Australia. The second layer is your local council, who adds their own specific requirements on top.
The Foundation: Australian Standard AS 2890.1
The key document that underpins every single vehicle access crossing in the country is Australian Standard AS 2890.1 – Parking facilities, Part 1: Off-street car parking. Now, the name might make you think it's all about carparks, but this standard dictates the crucial geometry of your crossing to make sure vehicles can get in and out safely without any trouble.
This standard lays out the non-negotiable requirements for several key elements:
- Minimum Width: It specifies exactly how wide the crossing needs to be to safely handle modern vehicles. For a typical residential driveway, you're looking at around 3 metres at the property boundary.
- Gradients (Slope): AS 2890.1 defines the maximum acceptable slopes. This is what stops cars from "bottoming out" or scraping their undercarriage. It also ensures the crossing is safe for pedestrians, prams, and wheelchairs to navigate.
- Sight Lines: The design absolutely must provide clear visibility for drivers leaving the property and for people on the footpath. This is all about preventing dangerous situations where a car might suddenly pop out from behind a fence or a hedge.
Following AS 2890.1 isn’t a choice; it’s the legal foundation for a compliant and safe access point. It’s what ensures consistency and safety, whether your project is in Newcastle, Sydney, or anywhere else in NSW.
Local Rules: Central Coast Council vs. Sydney Councils
The second layer of regulation comes directly from your local council. While AS 2890.1 sets the baseline, each council has its own Development Control Plan (DCP) that layers specific local requirements on top. These DCPs are tailored to the unique conditions of that area—things like soil type, common rainfall patterns, and different road classifications.
For example, the Central Coast Council might have very specific rules for drainage. This is because of the sandy coastal soils and the heavy rain events that are common in places like Wamberal or The Entrance. Their DCP could also specify certain concrete strengths or finishes that are better suited to the local climate.
By contrast, a council in Sydney, like Blacktown City Council, is likely to have stricter rules around traffic management during construction because of the higher population density and much busier roads. They might also have different specs for the kerb profile or require deeper excavation to handle the reactive clay soils found in many of western Sydney's suburbs. Knowing these local nuances is a huge part of what we do. For those also planning other structures, our guide on retaining wall regulations in NSW offers similar council-specific insights.
Why It Matters: These rules aren't just red tape. They are there to ensure public safety, protect council assets like underground pipes, and stop one person's project from causing a headache—like drainage or access problems—for their neighbours. A professional contractor knows exactly how to read both the Australian Standard and the local DCP to deliver a fully compliant result, first time.
The infrastructure for vehicle access is always being updated. In NSW, data shows a consistent push to upgrade crossings for safety, with poorly graded residential crossovers contributing to 12% of local access-related incidents each year. This is precisely why sticking to standards like AS 2890.1, which mandates minimum 3.5m widths for modern 4WDs, is so critical for homeowners. By ensuring compliant excavation and concreting, we prevent these common failures and help make our local roads safer. For a deeper look at these stats, you can explore the National Level Crossing Portal.
The Approval and Construction Process Step by Step
Getting a new vehicle crossing put in isn't as straightforward as just ordering a concrete truck. It’s a very structured process, and for good reason—it’s all about making sure the final product is safe, compliant, and built to last. Let's walk through the entire journey, from lodging the first bit of paperwork to finally driving on your new accessway.
Step 1: Lodging Your Application With Council
First things first, everything starts with a formal application to your local council. Whether you're dealing with Central Coast Council, Newcastle Council, or one in Greater Sydney, this step is non-negotiable. Your application will need to include detailed plans showing exactly where the crossing will go, its dimensions, and the materials you plan to use.
You’ll also have to pay an application fee, which covers the council’s time for admin and inspections. A word of warning: do not start any work before you have an approved permit in hand. Jumping the gun is the quickest way to get hit with a stop-work order and a nasty fine.
Step 2: The On-Site Assessment
Once your application is lodged, a council inspector will usually pay a visit to your property. Their job is to eyeball the site for any potential issues and make sure your proposal lines up with their Development Control Plan (DCP). They're looking for clashes with things like street trees, power poles, stormwater pits, and any Telstra or NBN pits that might be in the way.
This is also when a professional contractor like us would do our own deep dive. We get on-site to check the ground conditions, measure the slope, and make sure the design is actually buildable in the real world. A steep block in a suburb like Kariong, for instance, is a totally different ball game and requires a lot more excavation than a flat site in Tuggerah.
Step 3: Receiving Your Official Permit
If your application ticks all the boxes and the site assessment comes back clean, council will issue your official permit. This is the piece of paper that gives you the green light to finally get started.
The permit will also spell out any specific conditions you need to stick to. This could be anything from mandatory work hours and traffic control requirements to specific instructions on how to protect a nearby street tree. Think of it as the legally binding rulebook for the construction phase.
This infographic breaks down the compliance pathway from national standards to your final permit.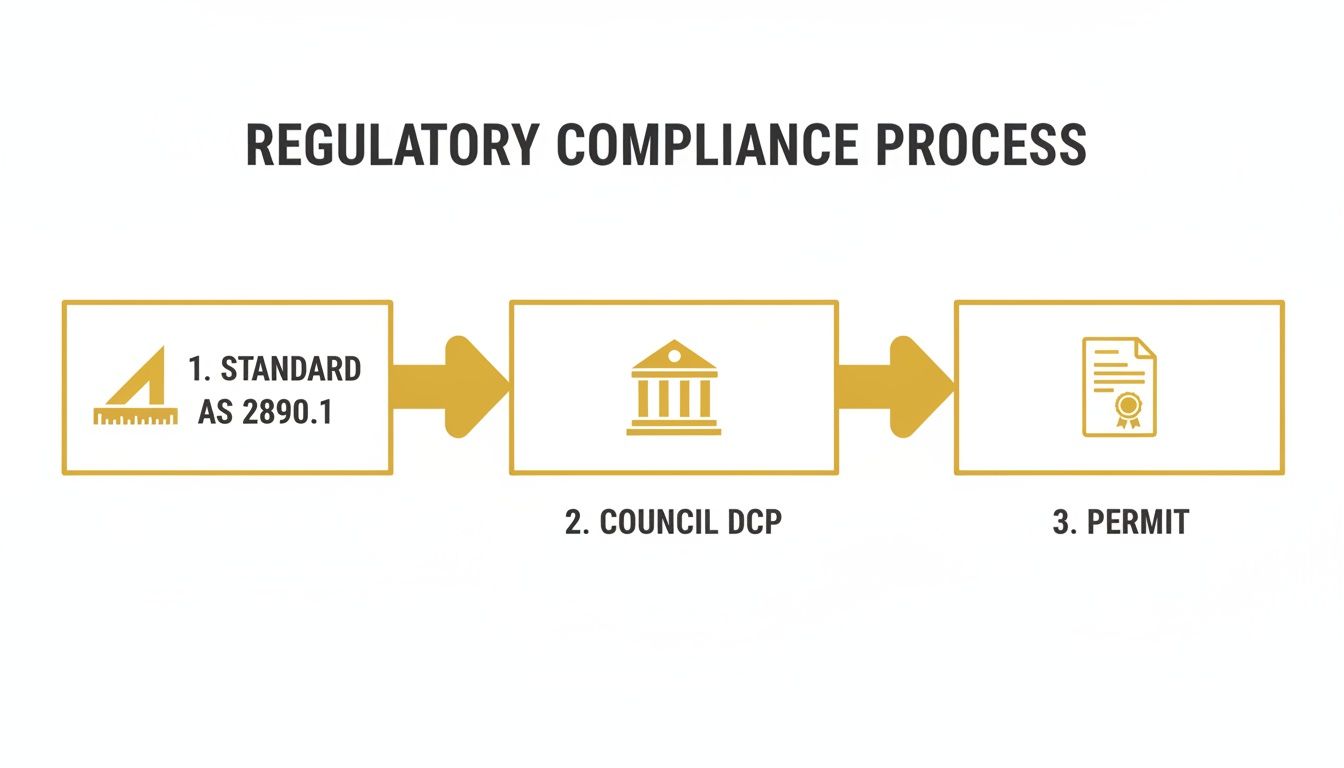
As you can see, a compliant crossing isn't just about one rule; it's about layering the overarching Australian Standards with specific local council regulations to get that final, valid permit.
Step 4: Professional Site Preparation
With permit in hand, the real work can begin. The absolute first thing we do is a Dial Before You Dig enquiry. This free national service is a lifesaver, providing plans of all known underground utilities. It helps us pinpoint exactly where water, gas, electricity, and telecommunications lines are buried. Hitting one of those is not just dangerous—it can lead to eye-watering repair bills.
Next, we get into the excavation and earthworks. This means digging out any old driveway, soil, and grass to get the levels and falls just right for proper drainage. In some spots, particularly in rural or semi-rural areas, this might also be when a driveway culvert installation is needed to manage water flow under the new crossing.
Step 5: The Construction Phase
Once the site is prepped and the ground is ready, we set up the formwork. This is basically a temporary timber frame that acts as a mould, giving your new crossing its exact shape and size. Inside the formwork, we lay down steel reinforcement mesh, which is what gives the concrete its structural strength and stops it from cracking down the track.
Then comes the concrete pour, making sure we use the specific strength grade demanded by your council. On busier roads, especially in dense parts of Newcastle or Sydney, this stage absolutely requires a professional traffic control plan to keep our crew, pedestrians, and passing traffic safe. You can see how we manage these logistics on major projects, like when we built a new commercial access driveway in Somersby.
Step 6: The Final Council Inspection
After the concrete has been poured and has had enough time to cure, there’s one last hoop to jump through: the final inspection. We book another visit from the council inspector, who comes back to check that the finished crossing matches the approved plans and meets all their standards.
Once they give it the final tick of approval, the job is officially done and dusted.
Choosing the Right Designs, Materials and Finishes
When it's time to build your vehicle access crossing, the materials and finish you choose will have a huge say in its lifespan, appearance, and whether it gets the green light from your local council. It's a balancing act between durability, safety, and kerb appeal. And while it forms the entrance to your property, it's crucial to remember that this slab sits on council land, making their specifications the final word.
The undisputed champion for vehicle crossings across NSW is standard reinforced concrete. It’s the go-to choice for virtually every council, from the Central Coast to Newcastle and Sydney, and for good reason—it’s tough, long-lasting, and doesn't break the bank. It provides a consistent, safe surface that ticks all the boxes for compliance.
The Importance of Concrete Strength and Reinforcement
Not all concrete is created equal, and your local council knows it. They will specify a minimum compressive strength, which is measured in megapascals (MPa). For most residential crossings, this is typically 25 MPa, more than enough grunt to handle daily use from family cars and utes.
Think of MPa as the concrete's ability to resist being crushed. For a standard crossing on a quiet Gosford street, 25 MPa is perfect. But if you’re building a commercial access point in the Hunter Valley that needs to withstand heavy trucks and machinery, the council will demand a higher strength, like 32 MPa or even 40 MPa.
Strength is only half the story, though. Concrete is brilliant under compression but surprisingly weak under tension—the pulling forces that lead to ugly cracks. That's where steel reinforcement mesh comes into play. It provides the tensile strength needed to hold the concrete slab together, preventing cracks from forming as the ground subtly moves or as it copes with the weight of vehicles day in and day out. Without it, your crossing would be on a fast track to failure.
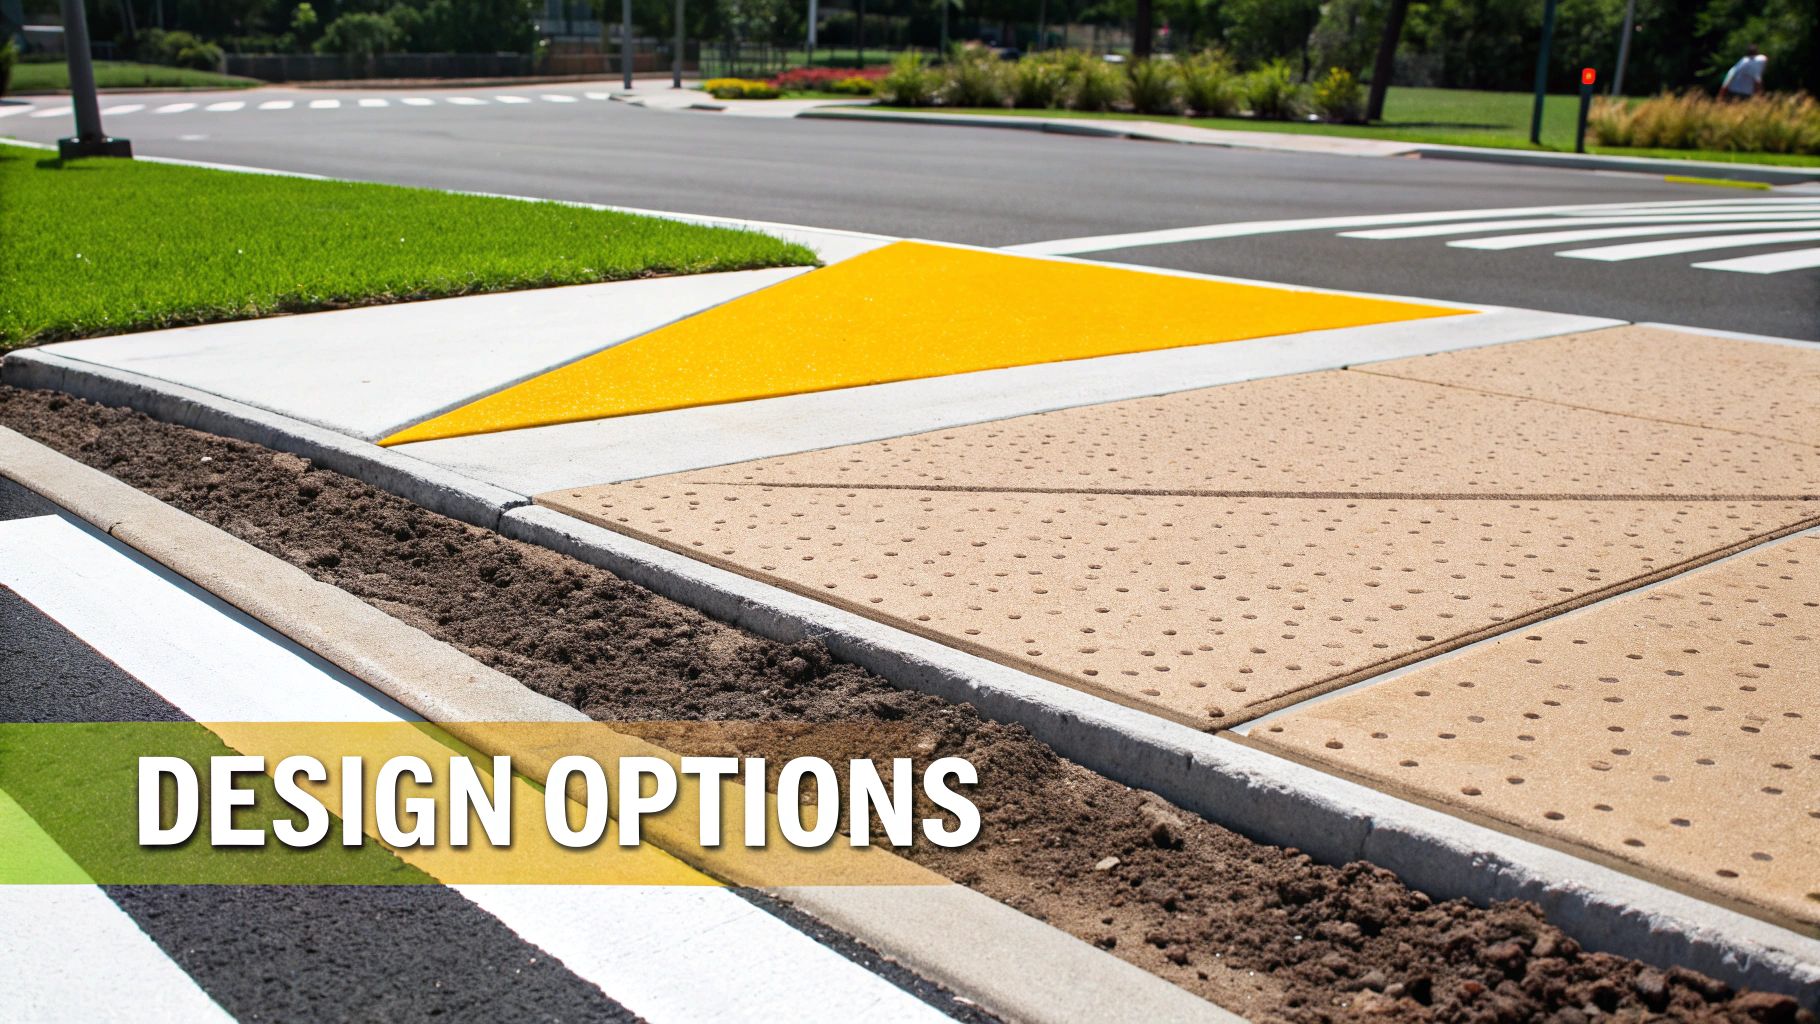
Exploring Decorative Finishes: What’s Allowed?
While standard grey concrete does the job, many homeowners want something with a bit more personality to match their landscaping or home's exterior. This is where decorative finishes come in, but you need to tread very carefully, as council acceptance can be a mixed bag.
Coloured Concrete: This involves adding a pigment directly into the concrete mix to achieve a specific shade. It’s a popular way to complement your home’s colour scheme and is generally accepted by most councils, provided the colour isn’t too distracting or out of place.
Exposed Aggregate: This finish is created by washing away the top layer of cement paste to reveal the small stones (the aggregate) within the mix. It creates a textured, visually interesting surface that’s a huge hit for driveways. However, many councils are hesitant to approve it for the crossing itself. Their main concern is that loose stones can be dislodged by traffic, creating a slip hazard for pedestrians or even becoming dangerous projectiles.
Our Pro Tip: Always, always confirm with your council before you set your heart on a decorative finish. We often recommend a "picture frame" approach. We build the vehicle access crossing in standard grey concrete to meet council requirements, then lay the rest of your private driveway in the decorative finish you really want. It’s a fantastic compromise that keeps both you and the council happy.
Comparing Materials for Your Vehicle Access Crossing
Choosing the right material is a crucial step that impacts everything from longevity to council approval. Here's a quick look at the most common options.
| Material | Pros | Cons | Council Acceptance |
|---|---|---|---|
| Reinforced Concrete | Extremely durable, long-lasting, low maintenance, and cost-effective. The gold standard for strength. | Can be plain in appearance. Can crack over time without proper installation and control joints. | Universally accepted and often mandated by councils across NSW. |
| Coloured Concrete | Offers better aesthetics than plain grey. Can be matched to property colour schemes. | Slightly more expensive than standard concrete. Colours can fade over time with UV exposure. | Generally accepted, but councils may have restrictions on certain colours to maintain streetscape consistency. |
| Exposed Aggregate | High-end, textured look with excellent slip resistance (on private land). Very durable. | Higher cost. Risk of loose stones, which is a major concern for councils on public land. | Rarely approved for the crossing itself due to safety concerns for pedestrians and potential for loose stones. |
| Paving/Asphalt | Can be visually appealing (pavers) or very cost-effective (asphalt for large areas). | Less durable than concrete for this specific application. Prone to movement, weeds (pavers), or softening in heat (asphalt). | Almost never approved for new residential vehicle crossings due to maintenance and durability issues. |
Ultimately, reinforced concrete remains the clear winner for council-owned assets like vehicle crossings. It delivers the non-negotiable safety and durability that councils demand, ensuring the crossing serves its purpose for decades to come.
Understanding the technical side of concrete and material choices is vital. To learn more about how these principles apply to other areas of your property, check out our guide on finding the right concreting services for your project.
Understanding the Factors That Influence Cost
Why can one quote for a vehicle access crossing be so different from another? The simple answer is that it’s never a one-size-fits-all job. Getting a handle on the key variables that drive the final price helps you properly compare quotes and see exactly what you’re paying for.
Several factors come into play, turning what looks like a simple project into something with its own unique cost challenges. A crossing is so much more than just a slab of concrete; it’s a piece of engineered infrastructure that has to perform under your specific site conditions.
Size and Scope of the Crossing
The most obvious cost factor is the size of the crossing itself. A standard single-car residential access point will naturally cost less than a wide, heavy-duty commercial entry designed for truck access. The total square metres directly influence the amount of labour, concrete, and steel reinforcement needed.
When it comes to concrete, accurately calculating concrete needs is a critical first step in managing your budget and making sure you don't run short. But the scope is bigger than just the concrete. A larger job also means more extensive formwork, more labour hours for the prep work, and often, more significant excavation to even get started.
Site-Specific Challenges
This is where costs can really start to diverge. A flat, clear block in a suburb like Tuggerah is about as straightforward as it gets. Now, contrast that with a steep, sloping block in Terrigal or Copacabana, which demands serious excavation and earthworks just to get the gradients down to what the council will approve.
Here are some of the common site challenges that add to the cost:
- Slope and Gradient: A steep site requires more cut-and-fill excavation to create a safe, usable slope. This adds machine time, labour, and costs for hauling away the excess soil. To get a better idea of how this is priced, you can learn more about the cost of excavation per cubic metre.
- Soil Conditions: What’s under the ground matters immensely. The sandy coastal soils we see all over the Central Coast are easy to dig but might need more work to stabilise. On the other hand, the reactive clay soils common in Western Sydney can swell and shrink, demanding deeper, more robust foundations to stop the crossing from cracking down the line.
- Existing Obstacles: Finding large tree roots, underground rock, or stubborn old concrete from a previous driveway all add time and complexity to the demolition and prep phase.
Compliance and Logistics Costs
The final piece of the pricing puzzle involves the non-negotiable costs that come with compliance and site management. People often overlook these, but they are essential for a legal and safe project.
Council application and inspection fees are a fixed cost set by your local authority, and they can vary quite a bit between different councils. On busier roads, especially in Newcastle or parts of Sydney, a professional Traffic Management Plan (TMP) is mandatory. This involves certified traffic controllers, proper signage, and specific safety protocols—a significant but absolutely vital expense.
Finally, any complex drainage requirements, like installing sub-soil drains to manage water on a tricky site, will also add to the final budget. These aren’t optional extras; they're essential components for getting the job done right the first time.
Common Mistakes to Avoid for a Hassle-Free Project
Building a vehicle access crossing might look straightforward on the surface, but a few common missteps can quickly snowball into a costly, frustrating headache. Getting it right the first time saves you money, stress, and the dreaded back-and-forth with council compliance officers. Over our 15+ years on the job across the Central Coast, we’ve seen it all—and these are the critical errors you absolutely need to sidestep.
The single biggest mistake we see? People breaking ground without an approved council permit. It’s tempting to get a head start, but any unauthorised work on the council road reserve will land you a stop-work order, hefty fines, and potentially an order to demolish everything you’ve just built. All at your own expense.
Failing to Locate Underground Services
Another potentially catastrophic error is neglecting to check for underground utilities. Before any digging starts, lodging a Dial Before You Dig enquiry isn't just a good idea—it’s an absolute non-negotiable. Hitting a water main, gas line, or fibre optic cable is incredibly dangerous and can leave you with thousands in repair bills and the fury of your entire neighbourhood.
This step is a core part of our professional process. It ensures we know exactly what’s under the ground before our excavator even touches the soil, protecting both our team and your property from a completely preventable disaster. SafeWork NSW has strict regulations around this for a very good reason.
Using Incorrect Materials or Gradients
Cutting corners on materials or getting the slope wrong is another classic pitfall. Using a lower-strength concrete than what the council specifies (say, 20 MPa instead of the required 25 MPa) guarantees premature cracking and failure. It simply won't stand up to the daily weight of vehicles and will be flat-out rejected at the final inspection.
Similarly, incorrect gradients are a recipe for trouble.
- Too Steep: A crossing with too much slope will cause cars to scrape their undercarriage—a constant source of annoyance for you and any visitors.
- Too Flat: A crossing without enough fall will cause rainwater to pool on the footpath. This creates a nasty slip hazard and can even direct water back towards your property.
Getting these technical details perfect is what separates a professional, long-lasting job from a DIY disaster.
Our Pro Tip for Longevity: Once your compliant crossing is built and signed off, a little maintenance goes a long way. Regularly sweep away leaves and debris from the crossing and the gutter channel. This simple act prevents blockages and ensures stormwater can flow freely, protecting your investment for years to come.
A properly constructed vehicle access crossing should last for decades with minimal fuss. By avoiding these common mistakes and bringing in a professional who understands the local council rules in areas from Newcastle to Sydney, you ensure your project is completed safely, legally, and to a standard that adds real, lasting value to your property.
Your Vehicle Access Crossing Questions Answered
We’ve covered a lot of ground, from council regulations to construction details. To wrap things up, here are the most common questions homeowners and builders ask us about vehicle access crossings. Think of it as a quick reference guide to give you a bit more confidence before you start.
Do I Always Need Council Approval for a New Driveway Crossing?
Yes, 100% of the time. This is a question we get constantly, and the answer is always the same. Because the vehicle access crossing is built on public land (the road reserve or nature strip), a permit from your local council is mandatory before a single shovel hits the dirt.
This isn't just bureaucratic red tape. The process exists to make sure your crossing is built to strict legal and safety standards, protecting both you and the public.
Trying to build one on the quiet can land you in serious trouble, with councils like Central Coast or Newcastle Council known for issuing hefty fines. Worse, they can order you to rip the whole thing out at your own expense. It’s a costly shortcut that’s never worth the risk.
How Long Does the Whole Process Usually Take?
Timelines can be a bit of a moving target, mostly depending on how swamped your local council’s planning department is. It’s always smart to be patient during the approval stage. A good rule of thumb is to allow several weeks for them to assess your application and issue the permit. Getting the paperwork in as early as possible is your best bet.
Once you have the green light, the construction itself is surprisingly quick. A standard residential vehicle access crossing can often be dug out, formed up, and poured within just a couple of days.
The most critical part after that is waiting. You’ll need to let the concrete cure properly for a minimum of 7 days before driving on it to ensure its long-term strength and durability.
Can I Build the Vehicle Access Crossing Myself to Save Money?
While the DIY approach might seem like a clever way to cut costs, most councils insist that vehicle access crossings are built by a licensed and insured contractor with proven civil works experience.
This isn't about creating extra work for people; it’s a crucial matter of public liability, safety, and quality control. A professional ensures the job complies with both Australian Standards and the council's specific local requirements.
Hiring an expert protects you from headaches down the track, like premature cracking, drainage problems, or having the council inspector reject the finished work. Ultimately, it’s the only way to guarantee you get it right the first time.
What if a Large Council Tree Is in the Way?
This is a classic challenge, especially in established suburbs across Sydney and the Central Coast where street trees are a defining feature. You cannot remove, trim, or damage a street tree without explicit, written permission from the council – they are considered valuable public assets.
Your application will trigger an assessment by the council's arborist, who will decide the best course of action. They’ll determine if the tree can be safely kept by using special construction methods to protect its roots, or if removal and replacement is the only viable option.
Proceeding without this specific approval can result in significant fines, so it’s absolutely essential to follow the proper channels.
At Booms Up Civil Group, we handle every single aspect of vehicle access crossing projects, from wrestling with the council applications to the final concrete pour. If you’re looking for a compliant, hassle-free result that adds real value to your property, get in touch with our team today.